2025 OT+ AUX Switches wiring

Did you buy the ebay listing above? Can you show pics of the connector end under the hood and the connector from the pigtail? Everything I have seen looks like the orientation is correct.
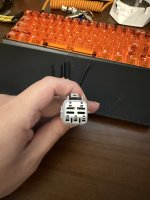
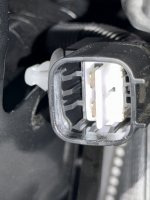
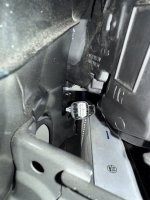
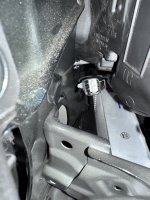
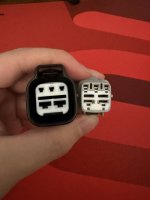
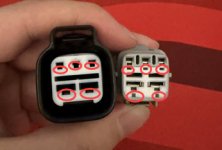
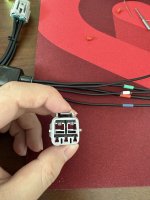
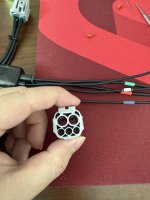
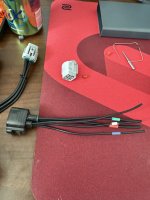
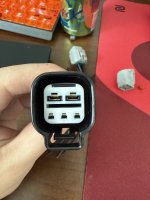
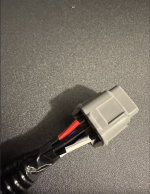
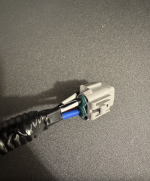
Yep, this cable I got from the link you posted. Here's a shot of Cable C — and the locking tab seems to face the opposite way from Cable B.
 

Attachments

  • cable from ebay.jpg
    cable from ebay.jpg
    128.9 KB · Views: 17
  • Front Right 1.jpg
    Front Right 1.jpg
    123.5 KB · Views: 11
  • Front Right 2.jpg
    Front Right 2.jpg
    123.5 KB · Views: 11
  • Front Right 3.jpg
    Front Right 3.jpg
    163.9 KB · Views: 10
  • Front Right 4.jpg
    Front Right 4.jpg
    173.9 KB · Views: 10
  • Front Right 5.jpg
    Front Right 5.jpg
    210.4 KB · Views: 12
Thank you for confirming this. I will let the ebay seller know and see if he can build one with the locking tab oriented properly. I will also see if he can color code properly also. Thanks!
 
Thank you for confirming this. I will let the ebay seller know and see if he can build one with the locking tab oriented properly. I will also see if he can color code properly also. Thanks!
I am thinking — would it be possible to remove the terminals from the eBay harness and insert them directly into the factory connector (Cable C) in the engine bay?

The idea is that since the eBay harness doesn’t physically fit Cable C due to the opposite locking tab, maybe I can just re-use the terminals by inserting them into the original factory connector, assuming the pin type and spacing match.

Here's a photo showing the connector mismatch — the tab orientation is reversed, but the pin structure looks pretty similar.
 

Attachments

  • Plug comparison 2.jpg
    Plug comparison 2.jpg
    88.1 KB · Views: 12
That is a good idea. I would say for sure that would work. But I am not sure how to remove them. I know they make the pin removal tool for a Deutsch connector, but no clue on these. The other thought would be to file down the locking tab on the ebay connector.
 
Based on my experience with these style connectors, you can unlock the pins and sockets by sticking a jewelers screwdriver into the circled holes shown in the attached image and push up a little while tugging on the wire. This should release the locking tab.
 

Attachments

  • Aus switch plugs.jpg
    Aus switch plugs.jpg
    16.5 KB · Views: 11
I pulled out the wiring harnesses and reinserted them into the original vehicle's port.
 

Attachments

  • port 4.jpg
    port 4.jpg
    162.3 KB · Views: 8
  • port 3.jpg
    port 3.jpg
    176 KB · Views: 10
  • port 2.jpg
    port 2.jpg
    170.4 KB · Views: 9
  • port 1.jpg
    port 1.jpg
    128.8 KB · Views: 11
Nice! Did the ends remove through the holes as stated by Garauld above? This looks like the best work around at this point in my opinion. Looks pretty slick too. Nicely done!
You need to pull out the white cover from the connector first, then use a pair of tweezers or another suitable tool to lift the locking tab while pulling the wire out at the same time.

I am just thinking right now about whether the wires with different colors correspond to the correct ports.
 
Great instructions as always! The connector on the vehicle does show the black and white common ground wire that would pin in to the connector next to your aux 1 connection. Why did you choose to not use?
 

GX550 Poll

  • No Noise

    Votes: 8 38.1%
  • Noise - Awaiting for Parts/Repair

    Votes: 9 42.9%
  • Noise - Repaired and Satisfied

    Votes: 4 19.0%
  • Noise - Repaired and Not Satisfied

    Votes: 0 0.0%
Back
Top